Category Archives: guitar - Page 3

Vermont Instruments Guitar Building Course – Week 2

Note: This entry and others on this blog reflect my own personal experiences at Vermont Instruments, taught by George Morris, during the weeks of October 11 – November 1, 2008. I left out a lot of the details of the process in order to keep this shorter and more for a general audience. There are plenty of good references available on making a guitar and guess what? Everyone does it differently!

You might want to read these posts first:
Introduction
Week 1

“Our interest is in training the next generation of luthiers. Put another way, we are not going to help you build a guitar, we are going to teach you how to teach yourself to build guitars.” – Vermont Instruments website.

Assembling the Parts – Week 2
We were right on schedule as we started up again on Monday – at least I thought we were on schedule, but what do I know? We had made our initial choices with regard to wood, body size, scale length; choices we were going to have to live and learn with for this first guitar. Those choices certainly have consequences once you string up your guitar for the first time and hear it, but I am getting ahead of myself. We have to make “the box”, from all those parts we made last week.

George would joke about having a ceremonial burning of the guitars at the end of the course. (I think he would have done it, too, if he could have gotten away with it.) The point is that the course is not about the guitar you are building, it is about the learning that takes place. We, as students, invest a lot of time into thinking about that “first one” and we become quite attached to it. But we shouldn’t get too attached. We know that. We can’t help it. It is a good reminder that this is your first guitar and not your last.

The first lesson of the week was on carving the heel block. That’s the piece of wood that attaches the neck to the body. In the bolt-on neck, there are two pieces – one glued to the neck and one glued inside the body. The piece on the outside is the heel and usually gets a carving treatment for both aesthetics and playability on the upper frets. There are a variety of designs here, but the basic idea is to have a smooth transition from the neck to the heel.

George demoing heel block shaping.

Heel design was one of those things that I never really thought about before. Decisions, decisions. I checked out my Martin D-18 back at our house. I checked out some plans in the shop for a dreadnought style guitar – a.k.a. a Martin. For most of us, it was difficult to visualize how you were going to get from the block of wood to a smoothly carved heel, but there was a method. Basically, you make a few rough cuts on the band saw along different dimensions to get close to where you need to be. Since you are working on 3 dimensions at once, you need to break it up into different planes and only work on one plane at a time, using a rasp or chisel.

Picture 4955 – first cut on heel block

My first cut on heel block.
Mark the lines to carve and follow them.
Sometimes you have to make lemonade from the lemons you, ahem, cut.

We started working on our headstock too. Not everyone was on the same pace, but the idea was to get the headstock cut out and holes drilled for the tuning machines. This happened over the course of a couple of days. We knew we had to get the neck prepared for assembly, so in-between other work, you could work on the heel carving or headstock. I can tell you I was never so tense as when I was cutting the holes for the tuning machines on the drill press. I held onto that neck for dear life!

Holes drilled in the headstock.

Some folks “missed” and had to plug the holes with dowel and do it again. Another lesson, hard-earned – you can always recover in some fashion; it’s either a do-over or an opportunity for a design decision to cover up a miscalculation or rogue router bit. But I’m not telling where those are. What happens in the shop, stays in the shop.

By Wednesday, we were ready to start on the multi-day process to prepare to glue sides to top and back. For the bolt-on neck people, this meant a number of steps designed to get the neck block on the inside of the guitar to line up with the neck itself and bolt on straight. You also need to prepare the sides for gluing, making one side flat and true, for the top, and the other curved to match the back curvature. Finally, you chisel away at your braces to make room for the sides and a perfect fit.

Jon and Tom got to glue there tops on right away because of the traditional neck arrangement they were using.

Adam helps Jon line things up for gluing the top.

I had to stay after school and finished up by 9 that night. This was an exciting day, however, because the guitar was starting to look like a guitar now.

My sides glued onto the top.

The next day, we got to take off the clamps and get ready for the back gluing.
Here are a few pictures of some happy builders.

Jon Tom
Brennan Lynn
Yours truly.

The only thing you have to do to get ready for gluing the back is to plane down the sides and sand them at the right angle using a big curved board with sandpaper on it. Remember, the back is arched, so you can’t just slap it on willy-nilly. In addition, you should do a sanity check on the neck angle to the top (at the bridge) and adjust with shims while you are gluing. I had to shim my neck a bit, as did the folks with the traditional neck attachment.

Lynn, Brennan, and I had to come back after dinner to finish gluing the top. George met us there to supervise this important (and permanent) operation.

Back glued to the sides now.
We now have a complete box with a neck!

On Friday, we spent some time getting our tops ready for the first coat of finish. Normally, you’d wait on this until all the woodworking is done, but because of our accelerated schedule, we had to start on it. Before finishing, you mask off the area where the bridge is going to be glued, since glue won’t stick to finish too well and the bridge area is the most stressed part of the guitar. You simply get your poster board pattern out and line it up on the fretboard to find the bridge placement. Now you see why getting that correct in the beginning starts to matter.

Tom’s guitar with the poster board pattern to find the bridge location.
Lynn applies tru-oil to his cedar top.

I think everyone will agree that the scariest of the scary, stressful, intense steps is routing the binding channels. The bindings are those little strips of wood or plastic that go around the edges of the top and back. You must respect the router! I already had two incidents where the router “got out of hand” and put some dings in the wood – you can’t get that wood back, folks (but you can make a design decision around it, hee hee). To route the binding channels, you have to take a router with a special jig on it and run it around the entire body of the guitar. After that is done, if you have any purfling (little strips of wood that appear on the top or back, these help to demarcate the edges of the guitar) then you have to do it again with a different depth setting.

George demos the router.
My top after routing part way.

Once the channels get routed, it’s fairly straightforward to put the bindings and purfling in. You do want them to be tight and you can’t really clamp them, so George uses a bunch of rope to get things into place without glue first so you can cut the bindings to the exact size, then glue them on. You use 2-3 ropes to secure things in place, just don’t break the bindings like “someone un-named” did.

George helps Brennan glue on his herringbone purfling.

And so ended our second week of guitar building. We have a box that still resonates. We have the beginnings of a real neck and it attaches to our body. We have bindings on. Now it’s nothing but finish work – a fretboard, frets, neck shaping, bridge, inlay, scraping, sanding, finish coats, and set up (i.e. strings).

My back bindings are glued up and roped up.

I spent Sunday morning gluing my top bindings, then my wife and son came up from Boston and we went to Hanover, NH for lunch and to the food co-op to pick up supplies for the next week. Yikes! Only 5+ days to go and so much to do to get to a finished product. The good news is that everyone is progressing along at about the same pace and we can see that there is a finish line in sight.

Chris
Continue reading about week 3…

My commute…

Vermont Instruments Guitar Building Course – Week 1

Note: This entry and others on this blog reflect my own personal experiences at Vermont Instruments during the weeks of October 11 – November 1, 2008. I left out a lot of the details of the process in order to keep this shorter and more for a general audience. There are plenty of good references available on making a guitar and guess what? Everyone does it differently!

Making the Parts
As I entered Thetford Center, VT, I pulled over and sent one last text message to my son, Zach. “Leaving civilization. No cell coverage up here”, I told him. I was on my way – to what? I did not know. Post Mills is off of US 91 just north of Hanover, NH. It consists of a general store – Baker’s, where you can get anything from beer and wine to sushi, a deli sandwich, plus your mail – a library, and a lake nearby. There’s even a live bait vending machine out in front of Bakers! Handy. But that’s about it for Post Mills.

Fairlee was the closest town nearby that had cell coverage, a couple of restaurants, and a slightly bigger grocery store, Wings. Plus, the Whippee Dip, an awesome take out place where we got some good barbeque sandwiches. Fairlee was about a 15 minute drive away on Route 5.

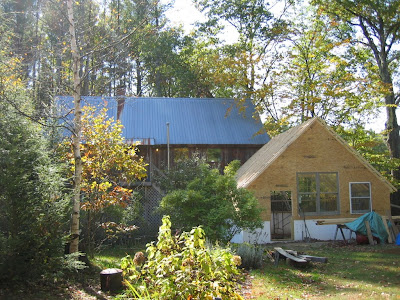
I arrived at Vermont Instruments, home of master luthier and teacher George Morris and his wife, Pippa, an artist. It was the afternoon of October 11 (my 22nd wedding anniversary, by the way!) and I found my way into “the addition” which was to be my home for the next 3 weeks. I met one of my fellow students at the door, Brennan, who yelled out for George in his house.

Our humble abode for 3 weeks.

George appeared through the door that connects the addition to his house and we all went over to the other rooms over the shop to meet some of the other guys in the course – Lynn and Jon. Tom, the fifth character in our adventure, was out getting lost on his way over from New Hampshire and hadn’t arrived yet. We exchanged pleasantries and jokingly referred to George as the Zen master – he kind of had that air about him; very calm, content perhaps, but also knowing what trials we were about to go through in this effort.

Of course, we were all clueless in this regard. We all had similar anxieties about what was about to occur. Did anyone ever make a guitar before? No. Do you know what you’re going to do? Yes, most had an idea. Does anyone know the schedule? Nope – nothing published on that front. Had anyone ever done any woodworking? No, again. Were you excited about starting? Yes!

The shop with in-progress expansion.

Anyway, dinner was at 6:30, hosted by George and Pippa. There, we got to know each other a little better and heard the garbage, recycling, and composting rules. We heard about Bali (another story, but the short version is that George is the master luthier for Blueberry Guitars and taught the builders there). There was some election talk and everyone was on the same page on that front. The pot roast was fabulous and the company stimulating – a great start to the course.

We began at 8 a.m. on Sunday, when we also met Adam Buchwald, our second teacher. Adam is an expert repairman and luthier and plays a mean mandolin and banjo. He’s not so bad on guitar either, I might add! Adam had just moved to Vermont from Brooklyn with his wife and 18 month old son and is helping George expand the school a bit – I think they have some other things up their sleeve, but I didn’t pry on that front. Adam had gone through the course 5 years ago. He proved to be a valuable addition to the mix and added to the personal attention that everyone got from both George and Adam. Believe me, we needed it!

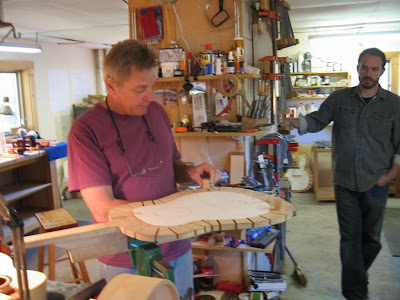
George shows us the workboard while Adam looks on.

The regular routine was 8 – noon, break for lunch, 1-6. If you had anything left after that, you could work at night, which we had to do a few times to keep in step. Usually, George started things off with a “lecture” around his bench and the whiteboard (no powerpoint here, thank goodness!) about whatever we needed to accomplish that day.

Something I liked about George’s approach was that he only provided enough information at any one time for us to complete our tasks for that day. We didn’t get a big overview of the course, a huge lecture, a “tell what you told them” routine, and so forth, like you do in so many of those adult classes that pop up everywhere. The philosophy was to learn by doing, and you were going to do it, or you wouldn’t be making a guitar. I also believe there was a conscious effort to not do things for you during the course. In other words, if you were having a question about how to chisel something, they would come and show you a couple of things, but you actually had to do the work. They were very good at backing off and letting you have a go at it, even if it meant making a mistake (the best teacher, after all).

But on to the actual content of the week…looking back, our goal was to get the top, back, sides, and neck ready for assembly in week 2. Something I learned is that there are often many steps in a process to get to the end point. You want a top in the shape of your guitar, ready for gluing? Well, then, choose the wood, glue it together, inlay the rosette, thickness it, cut the soundhole, cut the shape, cut braces, glue braces, shape braces, sand. Now, you’re ready.

George provides a notebook with all of his thoughts and procedures written out for you. Although this is an invaluable resource, I certainly didn’t have the time to study it thoroughly during the course. There is a great discussion of wood and acoustics and their relationship in the beginning. I just re-read it and am starting to understand it better now that I’ve been through the course.

The first morning we got familiar with our workbenches and went over some of the essential basics about how a guitar works, because we were going to stat choosing our wood right away. There’s a lot of theory and experience applied to choosing your wood to get the sound you are after in that particular guitar you are building. Do you want a warm or bright sound? Fast attack? Boomy bass? Evenness across the range? All of these things can be controlled by choices you make along the way and have to do with how the energy of the strings is transferred to and distributed across the structure of the guitar.

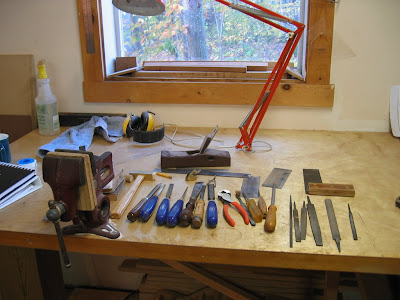
My workbench and tools.

I think the single most important thing you can do in guitar building is to choose high quality woods to use, although there is that famous Bob Taylor palette guitar. But for the amateur, like me, it’s probably more important to start off right away with good tonewood. We got going right away choosing our tops. George and Adam brought out a bunch of wood for us to pick through and tap on, either spruce or cedar. The goal was to join the 2 pieces together so they could set overnight.

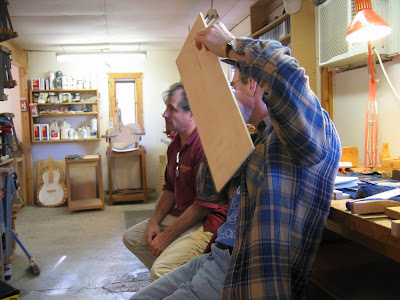
Tapping the tops.

We also had to choose what shape guitar we were going to build. Here’s where everyone ended up, all of us with completely different guitars:
Tom – a standard dreadnought, spruce top, maple back and sides, rosewood bindings.
Lynn – the Morris #9 style, cedar top, padauk back and sides, padauk bindings.
Brennan – 000 size, spruce top, rosewood back and sides, maple bindings.
Jon – classical body (for flamenco), cedar top, cypress back and sides, rosewood bindings.
Chris – Morris #9 1/2 style, spruce top, mahogany back and sides, rosewood bindings.
George and Adam – slope shouldered dreadnaught (Gibson style), spruce top, rosewood back and sides, maple bindings (I think).

All fretboards were ebony and the necks mahogany with ebony headstock veneer and bridge. We chose various scale lengths (the length of the strings from end to end), but most were in the 25.4 inch range (645 mm).

Lynn’s padauk back.

An important aspect of the process is to make an accurate poster board pattern of your guitar and fretboard. I cannot emphasize this enough. This pattern is used over and over again to create the dimensions of the guitar, especially the fretboard, which will determine how well and in tune the guitar plays. You don’t know this yet, but there a several key places on the neck that require these measurements. It will become apparent in a few weeks when you are trying to place the bridge and saddle on the top, too. Knowing where your centerline is, too, is also extremely important. The shop joke is about finding the right centerline so everything lines up, since you transfer the line to a few different pieces of wood at different times – let’s just say that it can stray off on its own.

My poster board patterns.

Working the top was a multi-stage process, as I outlined above. Let me tell you, the first time you have to cut into your top is traumatic. Actually, the second and third and fourth time is, too! We had to install our rosette patterns around the soundhole, clean it up with scraping and sanding, then cut the soundhole. This required some precise measuring and figuring to put it all in the right place. The first major cut after the soundhole was to cut the guitar shape out on the bandsaw. This was one of those go slow and don’t mess up moments but we all survived it.

The completed top, for now…

Later in the week we put on the braces in our chosen pattern. Brace patterns are another place where your choices effect the end sound of the guitar. You want them stiff enough to keep the guitar together but light enough so you don’t deaden the sound. Most people chose a variation of the standard Martin X-bracing. Jon did a flamenco fan sort of thing and Lynn did a lattice bracing. You glue the braces on using the go-bar deck – see pic below. Your sharp chisel is your friend while shaping the braces, always going back to tap the soundboard to see how you are effecting the sound.

Gluing on bracing – Jon’s guitar – with the go-bar deck.
My top after initial shaving of the braces.

Next, we dealt with the initial stages of creating a neck. This is cut from a big mahogany chunk going from 3/4 to 7/16 inches. The style we did was cut at a 15 degree angle on the fat end using the bandsaw, then planed and glued together to make the headstock (where the strings and tuners go). We had to make a choice on how the neck attached to the body – either the traditional method (a.k.a. classical style) or a bolt-on. Both work perfectly well. It’s harder to get the initial bolt-on set up correct, which some of us found out in week 3, but it has the advantage of being able to be removed easily, with no gluing involved. Tom and Jon did the traditional neck and the rest of us did the bolt-on. For me, each of my choices was based on what I wanted to learn in the course and although more difficult to execute correctly, it seemed like a good thing to learn.

Tom lines up his neck block.

The back was pretty straightforward. A bunch of wood came out of the humidity regulated storage and we picked through it to find the right piece for the sound we were after. You had to take the 2 pieces and joint them as we had done for the top and then scrape and scrape to get to the desired thickness. Later in the week we cut out the shape using our pattern added the bracing. One interesting aspect to the back is that it is not flat. It has a domed shape in 2 directions – side to side and over the length. That means your braces need to curve – it’s not hard to do, just something you have to do before gluing them on. The go-bar deck has one end that conforms to this complex curve so when you glue on the pieces, the back gets bent into that shape.

Brennan’s rosewood back getting braces glued on.

On the last day of the week, Saturday, we worked on the sides. You need to get bookmatched sets of wood, scrape and sand and plane them and align the grains so they are perfectly matched. Bookmatched means that the wood slices you are using used to be right next to each before someone cut them in half. In practice, it means that you have a set that have a matched grain pattern, so they look like twins. Sides also have a curvy side where it meets the back and a true side for the top. There are patterns available for you to follow that match your body style and size. Another decision point is how deep you want your guitar to be. This usually ranges between 4 1/2 inches and 3 inches. The curve typically will take off 1/2 inch at the neck end.

My mahogany sides getting bookmatched and lines up for bending.

The side-bending wasn’t as dramatic as I imagined it to be from my reading. There’s a jig that you use along with a heat source and some steel plates. The typical jig uses 3 lightbulbs for the heat source, and some folks used that. Adam brought in his modern heat blankets and spring steel, which worked really well. According to George, it’s the heat that makes the wood pliable, not water, as commonly thought. The heat can go up to 300 degrees. We bent the sides along with our bindings and the linings were done separately. You just have to use a different template for each size guitar you are building so you bend it in the right place and shape. Finally, we glued on the linings to the sides. These are what the top and back get glued to next week.

Adam with the bending jig and heat blankets, cooking some sides.
My sides getting their first lining glued on.

On Sunday, a few of us spent some time in the shop finishing our top and back brace shaving activities. I headed off to Quechee Gorge for the afternoon and got some great photos of the water by messing with my shutter speed. Some are quite abstract, but I like them.

Quechee Gorge

I went to Lebanon, NH to buy more socks (who wants to do laundry?), do some shopping at a big grocery store, and eat at Panera.

One thing I did not anticipate was how tired I was going to be at night. This was not a relaxing vacation, it was hard work everyday with only 2 days off. We’d usually get back to the addition about 6 p.m., make dinner, see if the internet was working enough to upload that day’s pictures – usually it was fine for uploads, but no other site was working – DNS issues with the satellite provider, then sit around and look at guitar books from the library there and discuss what we did that day and what was coming up the next day. It was total guitar building immersion and we all loved it! Where else can you go to talk about guitars 24×7 without boring everyone to tears?

Although we got a lot of pieces done this week, this was only the beginning. You cannot be in a hurry building a guitar. Measurements have to be accurate to the mm or less. And as I said earlier, there are many steps to get you to the finished product, with many opportunities for screw-ups. The weeks ahead will prove to be even more stressful as we start to assemble the pieces into what starts to resemble a guitar box.

Brennan’s OOO body with rosette ready for gluing next week.

Continue to Week 2

Vermont Instruments – Guitar Building Course – Introduction

Vermont Instruments Guitar Building Course – Introduction

I had always wanted to build a guitar from scratch, ever since my friend, Steve, did it in Phoenix at the Roberto-Venn School (where we grew up). However, it was never a priority with music school, a family, a job, and life, in general. This past summer I was complaining about something or other to Emily, my wife, trying to figure out what I could do with my upcoming 1 month sabbatical from work, graciously grandfathered in by IBM from my days at Lotus Development Corp. She suggested I go get it out of my system and learn to build one. What a great idea!! And so began my voyage into the somewhat esoteric world of lutherie.

I had been obsessing on guitars for a couple of years now, ever since I read Clapton’s Guitar by Allen St. John (which Emily had gotten me for Christmas, by the way). I started playing guitar in my teens, went to Berklee eventually, and then picked up the acoustic double bass as my preferred instrument. So, I wasn’t playing too much guitar, except at holidays for the family, when I could put everyone to sleep after a Thanksgiving meal. I tend to play folk, jazz, and fingerpicking music on guitar. I love bluegrass, but can’t flatpick too well yet, but I’m trying.

I was never one of those gearhead guitar players, always looking for the perfect sound; a search that never ends, really. I started out on an old beater guitar we had around the house when my older brother was into imitating the Beatles sound (strings 1/2 an inch off the fretboard) and my first purchased guitar was an Epiphone blond (I think it cost me $200 back in ’73 or ’74). I went through an Ovation 12-string and traded that for a no-name 6 string. In 1977, I had finally upgraded to a Martin D-35 that I had been coveting and playing at the Flagstaff Music store in AZ. Although the Martins of this era are not as highly prized as the ones from before (and after) it suited me just fine and plays nicely with a big sound. In 1978, after my interest in jazz was piqued, I purchased a ’58 (or ’57, Gibson’s are notoriously difficult to date) Gibson ES-175D (with the PAF humbucking pickups, for you guitar geeks out there) for $500. I was set for life, I thought – Martin for acoustic playing and a Gibson 175 for jazz – not bad for a poor student.

And I was set. Until I got that well-known guitar disease known as GAS, or guitar acquisition syndrome. It started with that book.

The St. John book, which chronicles how he got Wayne Henderson to build 2 guitars for Clapton, talks about the history of the instrument, its makers, Henderson in particular, but also about Martin guitars and others in some detail. The process was fascinating to me. Here you are taking some pieces of wood and crafting them into an instrument to die for. But I’d never get a Henderson – the waiting list is something like 10 years and that’s if you are lucky and be around to bug him to build it. I “settled” for a Collings OM-2H short scale. Some people buy cars, I like guitars. The next year I just “had to have” a Martin D-18 to round out the collection and found a D-18GE on craigslist that I purchased. In the small world department, I sold one of my upright basses to a guy who plays in the same bluegrass band as the guy I bought the D-18 from!

Which brings me to the next chapter in the saga and the beginning of this journey into lutherie and building my first guitar. After a quick search on Google, I found the perfect match for me – Vermont Instruments, run by George Morris. A 3-week course, in New England, everything built “by hand” and an instrument at the end to show for it. It really was the right thing for me.

Some statements on the web site were very appealing to my own goals:
“We follow the hand-building tradition, not the factory model.”
“…everyone builds a straight-ahead, high-quality guitar with special attention paid to the most important aspects of the instrument: craftsmanship, tonal quality, playability, and strong design.”
“The course is tailored to do two things: produce a very fine instrument and, more importantly, prepare students to continue their own work as soon as possible without having to invest in expensive equipment.”

When I called George in July to find out more, I got even more excited. He talked about how it is the process that we would focus on, not the guitar. I was anxious about all the unknowns – what kind of wood will I use? do I have to have a design ready? do I have to know what I’m going to build? what scale length, how many frets, etc, etc. George said not to worry about any of that stuff. “If you focus on the process, then you’ll build a good guitar.” Truer words were never said.

We were there to learn how to build a guitar, by building one. As the later email said to us before we arrived, “We are not in the business of, or at all interested in, helping anyone build their long wished-for masterpiece. That just slows us all down and gets in the way. We find that attention paid to the process and not to the product always results in good product.” We (the students) often repeated this mantra during the course to each other – “it’s not your masterpiece, it’s your first guitar”.

And I must say, that while no masterpieces were created, each person in the course ended up with a really nice sounding instrument.

Here’s me with my guitar, on the last day, after I spent 4 hours doing the inlay work.

The next few posts will discuss each week of the course, so it’s in more digestible segments. I took a lot of pictures to document every step, but I realize not everyone wants to know every detail; if you do, you can look through all 600+ of them. As George explains it, the 3 week course roughly follows this outline:
Week 1 – make parts. Top, back, sides, neck.
Week 2 – assemble parts.
Week 3 – finish and setup.

Enjoy!

Continue to Week 1

Chris